| cosam.org |
The Salvage Operation
It shouldn't come as any great surprise that in order to put your A1200 in a new case, you'll need to remove everything from the old one. Keep hold of everything you remove; even the most useless-looking piece of bent metal might be just what you're looking for later on. Also, if the original case is in good condition, it's nice to know you could always put it back together again - in any case, you may need to do this at some stage when troubleshooting problems later.
Depending on the age and history of your machine, it could be anything from a pristine collector's item to a yellow, dusty wreck. In any case, try to resist the urge to blow any dust away as you're dismantling it. Get hold of a can of compressed gas which is sold expressly for removing dust from electronic equipment (available in most hardware, DIY or some computer/electronics stores). Not only will you be protecting the parts from your slobbery spray, they're also a hoot to use and handy for cleaning all manner of items.
 My donor A1200 had seen better days... |
It's a good idea to take precautions to avoid zapping the innards with static electricity. If you don't have anti-static wristbands, etc. discharge yourself by touching a bare metal radiator pipe, some other grounded object or at least something large and metal before handling any potentially sensitive electronics. Don't go walking around with rubber shoes on a nylon carpet and avoid touching the pins (or anything connected to the pins) of any chips, etc. The SMT (Surface Mount Technology - the way the chips are soldered to the motherboard) construction of the machine makes it pretty reliable, but also hard to repair should you blow anything up.
Opening the Case
Opening the case is simple enough. There are seven main screws holding the top and bottom halves together, plus another two along the back edge which hold the floppy drive in place. Undo the lot, then turn the whole thing over and lift off the top enough to disconnect the PCB sporting the power/floppy/hard drive LEDs.
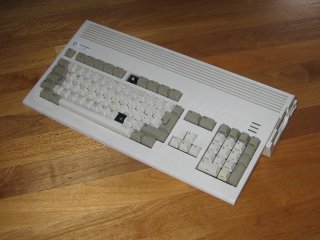
Removing the keyboard
The keyboard ribbon cable is held in place with a plastic clip. Lifting the clip upwards without removing it completely is enough to release the keyboard, which can then be lifted out by tilting it towards the front of the case.
Removing the Floppy Drive
You can safely disconnect the floppy drive's power cable (it only fits in one way) and ribbon cable (pin 1 is clearly marked on the motherboard). As mentioned before, two screws at the rear of the case hold the floppy drive in place, along with one more which fits in a special bracket on the other side of the drive. Undo this and you should be able to lift the drive out.
Removing the Hard Disk/Bracket
If there's a hard disk installed, disconnect the ribbon cable first. The mounting bracket can simply be lifted out.
Removing the Shielding
Almost the whole motherboard is covered with a metal shield to prevent RF interference, which is kind of overkill if you're putting it in a metal box. If you want to remove it, be careful of the edges, which can be very sharp. Pry open the small tabs around the edge which hold the top part in place. Some tabs may be bent the other way than the rest, so if the shield doesn't pull out right away, check for any you missed before. If all tabs are bent perfectly straight the shield will simply lift out, but don't be shy to use gentle force if you don't mind bending the metal.
Removing the Motherboard
The motherboard itself is connected to the lower part of the metal shield by the screws in the rear ports. You should be able to lift out the whole lot as one unit by tilting it up towards the rear of the case. I'd recommend keeping the board in the lower half of the shield for now - depending on how you mount it in the new case, you may never have to remove it.
If you decide to mount the board in the case without the shield, you can take out the board itself by removing all the screws next to the connectors on the rear. You'll probably want to put these back in later on. Between the board and the shield, there's a plastic insulation sheet which could be useful for something.
Next: The New Case >>
![]()
![]()
![]()
![]()