| cosam.org |
Reset Button
If your case has a reset button, you can hook it up to the Amiga quite simply. Instead of soldering wires to the keyboard chip, you can access the so-called "Keyboard Reset" line from the test pads near the PCMCIA connector. It's an active low signal, and it's pad is conveniently located next to a ground pad. Connecting the two pads will therefore result in a reset, just like pressing Ctrl-Amiga-Amiga.
The reset button can even be connected directly to these two pads, but I figured it'd be a good idea to put a capacitor between the wires. To this day I'm still not sure if it helps, but it works fine.
In any case, a simple and neat way to connect to the motherboard is by soldering some header pins into the test pad locations. I found that the ground pad (far left) didn't actually have a hole, or at least was so full of solder I couldn't open it up. The hole in the other pad also needed a little widening. If you have a small enough drill bit, that'd be the best way to make the holes. Otherwise, you can get the job done with a soldering iron and a pointed blade (I used a scalpel). You'll however need to be very careful on the underside of the board as not to remove any of the PCB tracks!
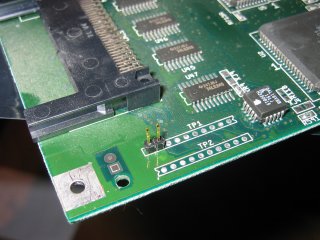 A couple of header pins soldered into the test pads. | 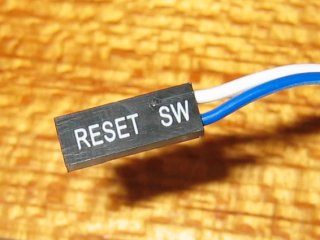 The reset button's wires usually have one of these on the end. |
The pads are spaced at 0.1 inches, meaning that a PC reset button's plug will fit exactly over the pins you soldered in. You can also buy such plugs with wires already attached in electronics stores should you need to extend the cable or hook up to a circuit elsewhere in the case, as I did.
Next: Interface Circuits >>
![]()
![]()
![]()
![]()