| cosam.org |
Floppy Drive
As with most things, there are two main options for installing a floppy drive: the cheap, yet more difficult way and the easy, more expensive way. I'll be looking at both methods in a moment. Then again, if you can get hold of a floppy drive from an A1/2/3/4000 or similar, I'd guess they'd work too (but don't quote me on that).
Fortunately, the wiring is simple enough and you can use regular PC parts for both the power connector and the ribbon cable. All AT and ATX PSUs I've seen have one or two of those small, four-pin connectors for floppy drives which you can hook up as-is.
The ribbon cable must however be a straight connection, so you can't use the end connector on most PC floppy cables, as there is generally a twist in the cable. Either use the middle connector or, if you need more length, remove the twist by opening up the plug assembly and turning the reversed wires back. Be careful opening such connectors up, as they're kind of a once-only design and break rather easily. You can however pick up spare connectors at your local electronics store, who will also be able to supply you with ribbon cable should you wish to build your own custom cable.
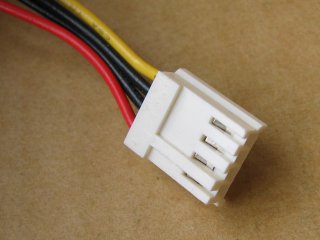 Floppy drive power connector. | 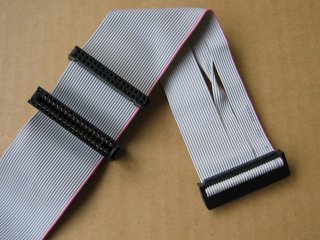 PC floppy cable - watch out for that twist! |
The Hard Way
Your A1200 probably came with a perfectly functional floppy drive, which you may be able to make use of. However, the unit has no front, so we have no spring-loaded flap and no little LED to show us when the drive's being accessed. The absence of the flap usually leads to major amounts of dust in these drives, which you'll probably want to clean it out with some of that compressed gas in a can.
Retro-fitting a PC floppy drive's facia to the internal FDD unit sounds easy enough, but it is a lot of rather fiddly work. The main problem is finding a facia that fits (or can be made to fit) the metal parts of the drive. You'll most probably need to modify the metal "runners" along the underside of the unit and/or the plastic clips on the facia. It is possible that you could replace the runners with those from the donor drive, depending on the model.
The problem is made worse by the rather unusual placement of the eject button when compared to most PC units. The button itself is also pretty wide. Unless you found the perfect-fitting facia, you'll need to modify either the facia itself (i.e. make the hole bigger) or the stub to which the original eject button is attached. Modding the facia is of course the easier option, but it may not look so great if your facia and the original button are different colours. Hacking the metal stub is not for the faint-hearted as it's rather hard to get at without dismantling half the drive, which generally results in tiny springs and screws flying all over the place, never to be found again.
Whatever you do, be careful not to hack away too much of anything! The original internal floppy unit seems to be shorter at the "open end" than many PC drives, understandable when you consider the A1200's case design. I found that the eject button of a PC drive needed to be mounted a good few milimetres proud of where you'd expect it to clip in. Keep checking the fit of the facia and test the mechanism with a disk before you fasten things together - there is surprisingly little margin for error here!
The LED problem is the easiest to solve - the original internal units have the solder pads for an LED, there's just no LED on them. You can therefore solder a miniature LED directly to the drive and you're done.
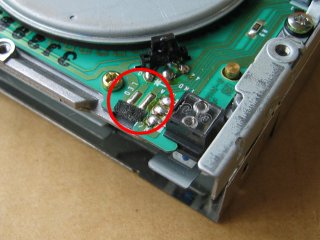 Solder pads on the underside of the internal floppy drive. |
Otherwise, you can mount a larger LED on the inside of the facia. I've done this before using an old connector block and some super glue. Remove the screws and metal parts from the connector block and make sure the LED is a tight fit in the tubular section. You can then cut out a sort of T-shaped section with a flat surface you can glue to the little window in the floppy facia. The small black rings pictured are meant to be used with clips for panel-mounting LEDs, but I used one over the connector block tube to give a bit more rigidity. I touched the rest up with black model paint - I'm not sure if it really helps, but the LED did appear a little brighter when viewed from the front afterwards.
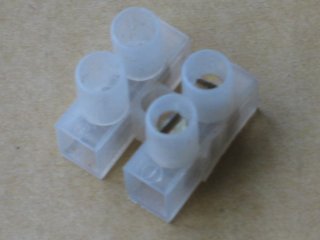 1. Take an old connector block. | 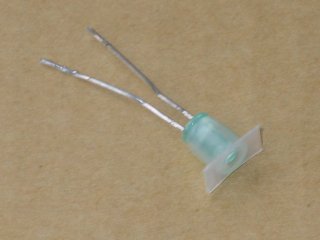 2. Trim off a tubular section and fit the LED. |
 3. Solder a couple of wires on. | 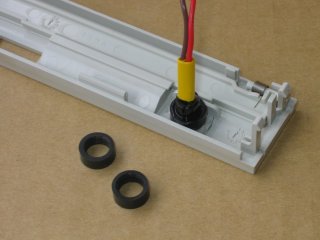 4. Glue the whole lot into the facia. |
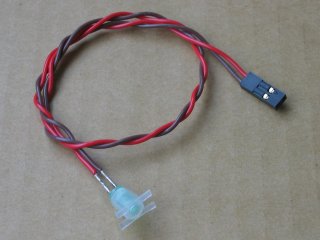
The original idea was to connect the LED to the circuit board I made as an interface to the motherboard LED header, so I soldered a couple of wires with a header connector to the legs. You could just as easily solder the legs directly to the floppy drive's PCB, but then again you probably wouldn't bother mounting it on the facia then.
The Easy Way
By far the simplest floppy drive solution is to get hold of an external drive and use the bare unit within. You'll of course want one with a PC-like facia, as opposed to the sort with a moulded plastic housing. If you have the choice, I'd recommend going for a model you can easily open up - some Cumana drives, for example, have no screws and must be cracked upen with a knife or screwdriver.
Here's the donor drive I used for my own tower - it was majorly yellowed and had been written on with a marker, but I was planning to paint it up anyway. I'm assuming that most drives are in essence the same.
 An old external floppy drive. |
Inside the case, I found a drive unit which was almost identical to my original internal one. In the back of the case was a small circuit board which connected it up to the cable and the port to any other drives in the chain. Thankfully, the drive unit itself has a regular 34-pin connector - I've heard that some don't and I wouldn't know what to do with such a part.
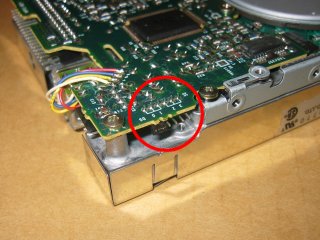 The drive jumper, set here to zero. |
The drive didn't work for me right away. I read about jumpers on the web a few times, but it took me a while to find the actual jumper on the drive unit! It should of course be set to "0" if you want to use it as the DF0: drive.
Using HD or PC Drives
As far as I know, there are proper HD (high density) drives available for the A1200 and A4000. There are also plently of various hacks out there about using PC drives, whether they be DD or HD versions, on Amiga systems. I've never tried any of them myself, but if you'd like to there are details in Aminet's hard/hack section.
Next: Hard Disks and CD-ROM Drives >>
![]()
![]()
![]()
![]()