| cosam.org |
Connecting RQDX3 and MFM drives
As the combination of RL02 and VTServer didn't want to work, it was time to dig out the RQDX3 card and see if I could get some disks hooked up. Along side the RD32 I already had, which holds about 40MB, I've also acquired two RD53 hard disks. These hold 70MB a piece, meaning I'd have plenty of room for a decent 2.11BSD installation. Here's hoping VTServer will work with this set-up...
These MFM disks are usually connected to the controller by means of either
a distribution board in the BA23 chassis or the M9058 module in the BA123.
Having neither of these, I needed to fix up some kind of adapter to
link the 50-pin header of the RQDX3 to the 20- and 34-pin PCB edges on the
disks. Apparently the pinouts in the manuals can be incorrect. Thankfully
I found
a page with the correct pinouts ![]() on the web. Although the above explains how to make cable for a single
drive, adding a second is just a case of hooking up the RD, WR and drive
select signals to a second 20-pin connector. The 34-pin connector is common
to both drives.
on the web. Although the above explains how to make cable for a single
drive, adding a second is just a case of hooking up the RD, WR and drive
select signals to a second 20-pin connector. The 34-pin connector is common
to both drives.
If you have the means to get a PCB made, you may want to try building one
like this ![]() (see the parent directory
(see the parent directory ![]() for more info). One-off PCB manufacture can however be pretty pricey, so
I went down the homebrew route and made the adapter pictured here.
for more info). One-off PCB manufacture can however be pretty pricey, so
I went down the homebrew route and made the adapter pictured here.
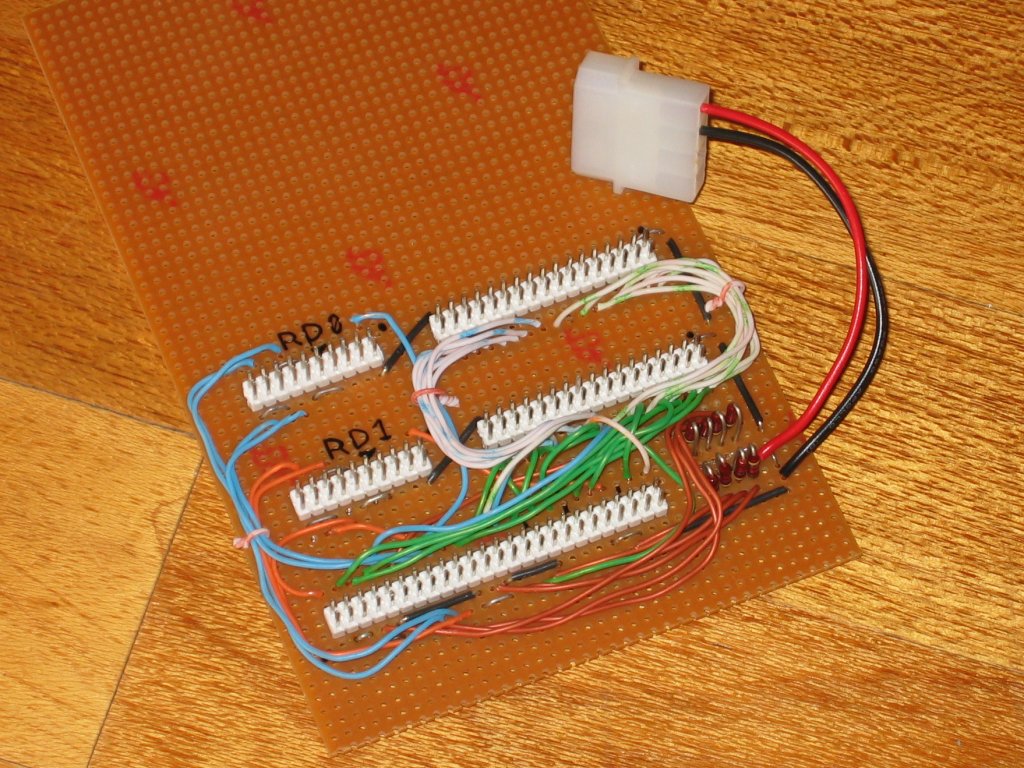 A simple RQDX-to-MFM hard disk adapter. | 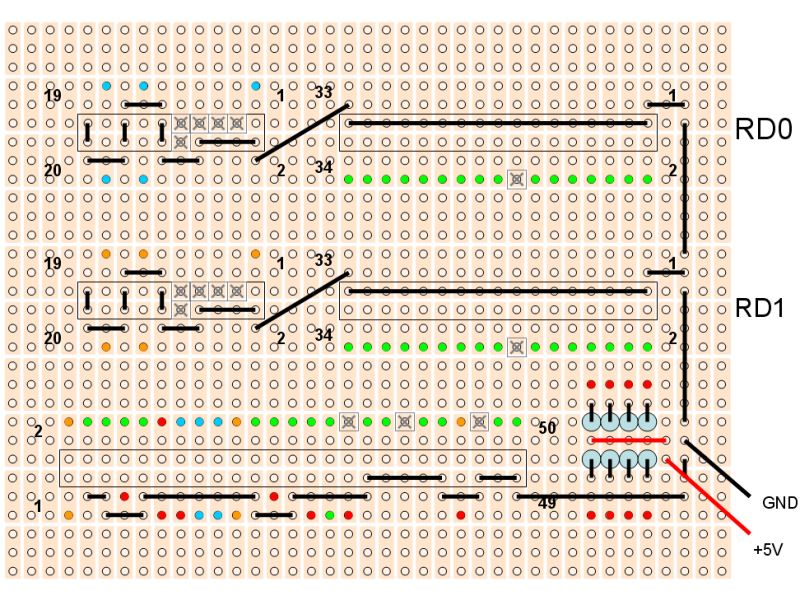 The layout on 3-hole/track stripboard (click for a larger version). |
Simply fit a 50-pin ribbon cable (such as an old SCSI cable) between the RQDX3 and the header on the adapter. Pin 1 on the RQDX3 is to the right when viewing the card from connector's end, component side up. From here the signals are distributed to two sets of 20- and 34-pin headers which connect to the drives using shorter cables fitted with edge connectors. I did away with the usual front panel by tying all the "drive ready" and "write protect" signals high using 4K7 resistors. Power to both the disks and the adapter comes from a regular PC power supply. For the time being, the whole lot is lying on top of the the lower RL02 unit in the cabinet. I'm planning to mount everything on a 19" shelf as I do have about 3U of space just under the main system box.
As one of the RD53 units was labeled as a "system" disk, I thought there may be a chance of booting off it straight away. The boot ROM, however, had different ideas and complained about device errors or something. Chances are the disk was formatted using another type of controller and was therefore not going to work with the RQDX3 at all.
Formatting is easy enough, altbeit a bit time consuming, and is done from
XXDP. Just run the formatting program for the RQDX3 (ZRQCxx) and answer
the questions. The formatter is even able to detect the type of disks.
After about 20 minutes, the program spits out a table of statistics and
your disk is ready for use. If you don't have bootable media of XXDP,
there is also a handy
standalone version
of the formatting program ![]() which can be run using VTServer.
which can be run using VTServer.
Next: Installing 2.11BSD: Part I >>
![]()
![]()
![]()
![]()